Basic Wind Direction Indicator
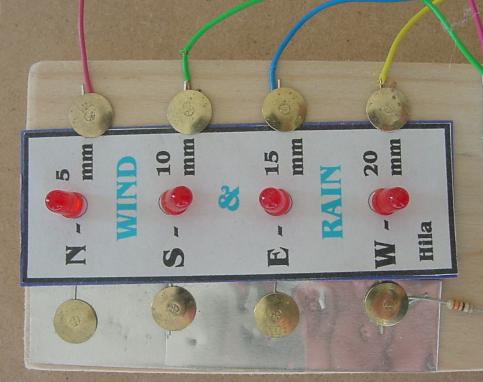
A simple wind direction indicator can be constructed by creating a wind operated "switch" to control small lights (LEDs) indicating wind direction.
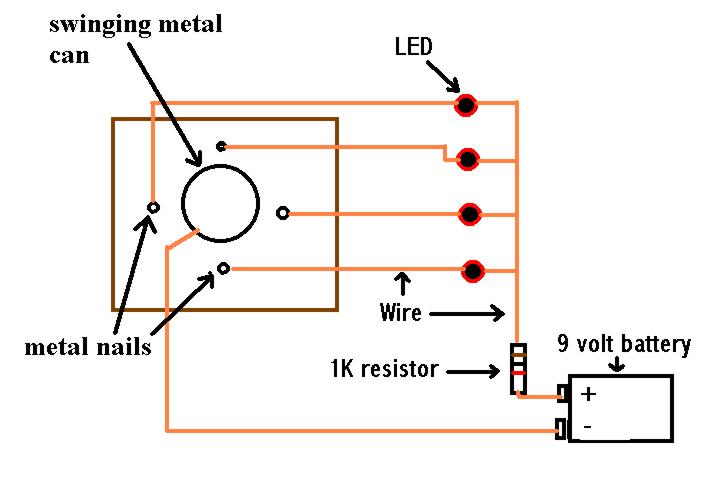
In the above diagram the swinging metal can is connected by a wire to
the "-" side of the battery.
The metal nails are each connected to an LED with a wire.
The metal can completes a circuit when it touches one of the metal
nails.
The LED attached to that nail lights up.
(Remember - electricity flows through metal.)
If the swinging metal can is outside, wind will blow it against a nail,
turning on an LED.
Different LEDs will light up when the wind changes direction - indicating
wind direction.
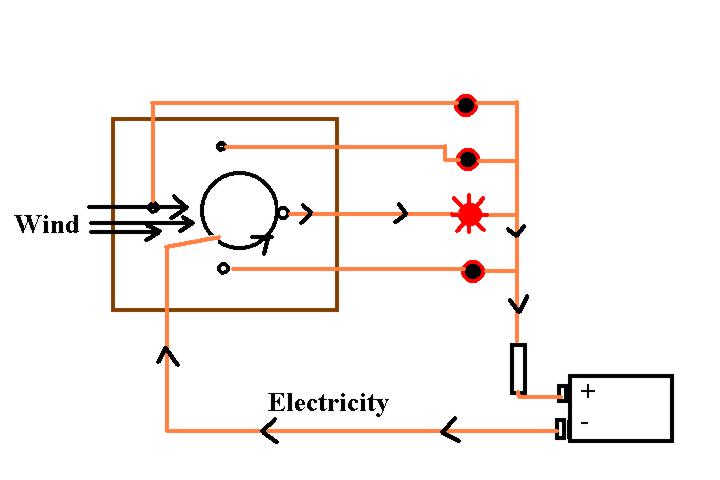
In the diagram above the metal can has touched a nail completing a circuit and allowing electricity to flow through an LED.
If you use a metal soft drink can be sure to sand all of the paint off of it. Paint is an insulator and stops electricity from flowing.
An option for a metal can is to cover a film cannister with aluminum
foil - we use this at Hila.
The picture below shows the device we construct at Hila for indicating
wind direction.
Instead of nails we cut aluminum strips from cookie sheets and use
thumb tacks to hold them in place on a wooden block.
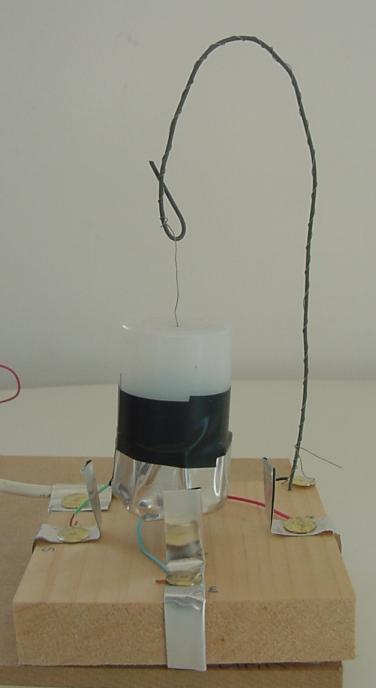
The wires you see conneced to the foil pieces each connect to an LED.
(See picture at top)
The fine wire going into the film cannister is connected to the "-"
side of the battery and is also connected to the foil wrapped around the
cannister.
Remember you need a resistor when using LEDs with a 9 volt battery.
I suggest a resistor between 300 Ohms and 1000 Ohms.
(More information about electronics and LEDs)
In Ottawa you can purchse LEDs and resistors at Active Components on Merivale Avenue.