Electronic Rain Gauge
Some simple electronic components
are all you need to construct a basic remote reading rain gauge.
That's right, you can build a device
that will allow you to check the amount of rainfall from the comfort of your
own bedroom!
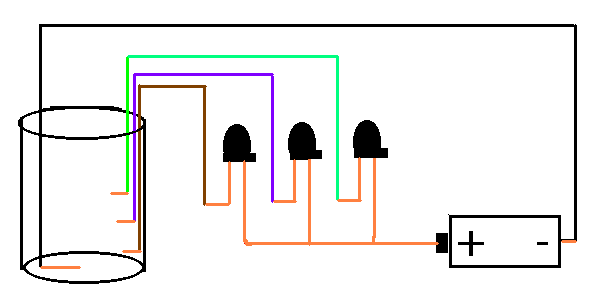
The design is simple. A series of
lights are connected in such a way that rising water will complete the circuit
and turn each light on in sequence. Water is not normally a good conductor
of electricity but a "pinch" of salt added to water creates a salt water
solution that is a good conductor of electricity.
Use a cup with parallel sides to
hold your wires, add a bit of salt and wait for the rain. This animated GIF
demonstrates how the electronic rain gauge works. The "white" lines in the
salt water show the completed circuit through the salt solution.
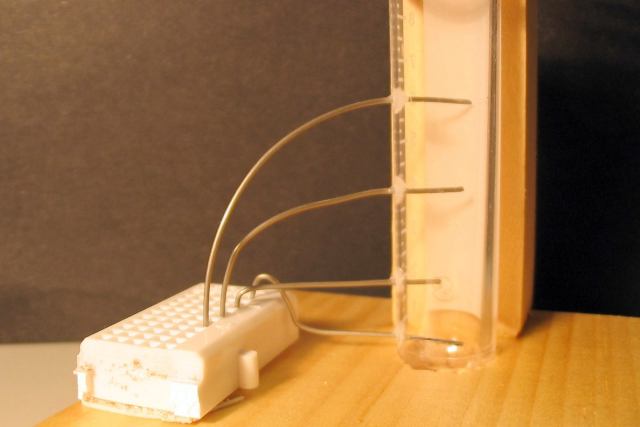
In this rain gauge sensor, wires are inserted in holes drilled in
a plastic tube.
Glue is used to seal the holes.
Holes are 2 cm apart.
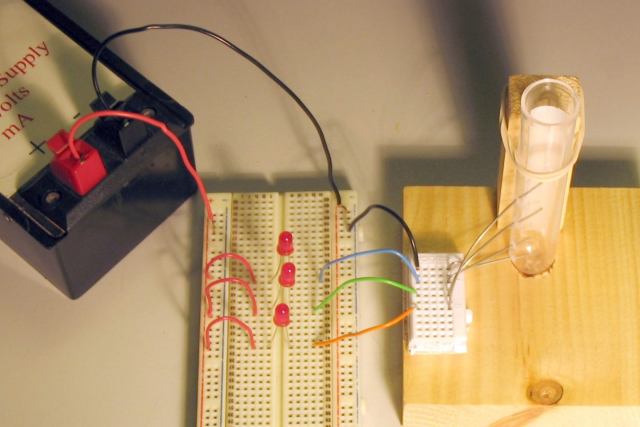
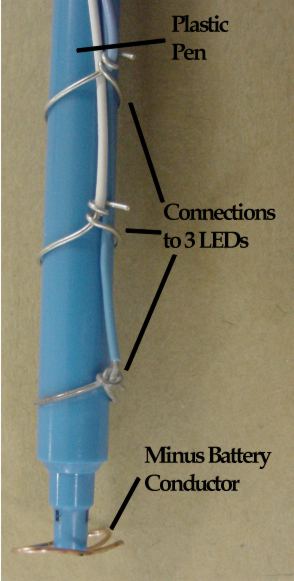
Rain gauge sensor connected with "-" battery connection at bottom.
As water rises in the tube the LED's will light in sequence.
Salt is used to increase conductivity.
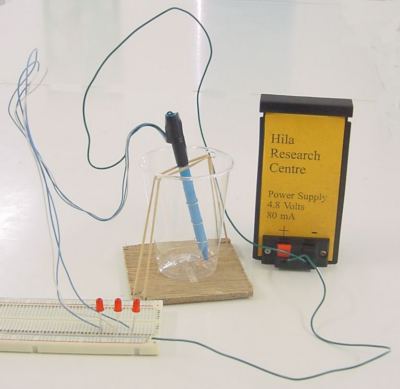
Another idea for a rain gauge.
We used the plastic tube from an old pen to hold the wires
for our rain gauge. The wire from the "-" side of the battery goes down
the center of the tube. We spaced the outer 3 wires 1 cm apart so that the
lights would each indicate 1 cm of rain. A plastic cup secured to a
piece of wood makes a sturdy base. We used LEDs for the lights. (About LEDs).
You need long wires to put the cup outside. Telephone extension
cables are inexpensive and are often available at Dollar Stores.
You may notice bubbles of gas rising from the "-" wire
in your cup, this is hydrogen gas. The electricity, salt and water combine
in some interesting electrochemistry.
Return