
Introduction
Setting up this computerized scale will involve both the construction
the hardware and the writing of a simple Q-Basic program. These directions
assume that certain materials are available (as provided through Hila workshops).
Only a rough guide for constructing the hardware will be here provided.
We shall rather focus on the software side of this project.
Hardware Assemblage
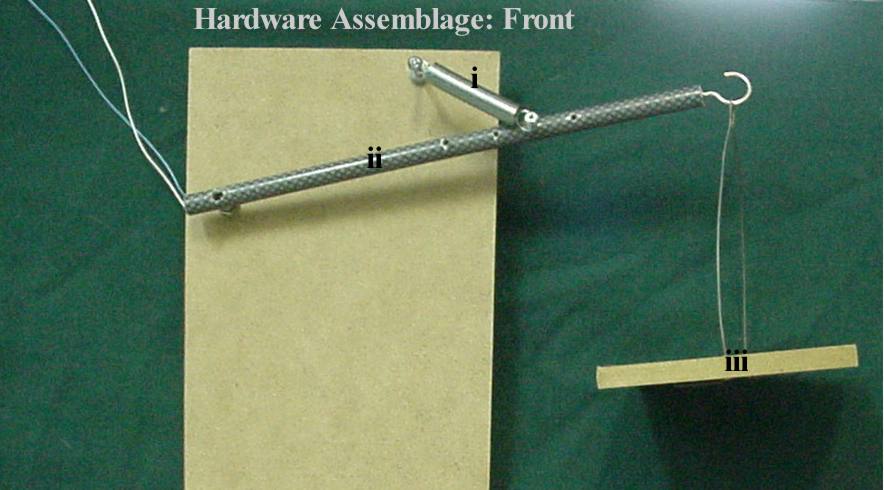
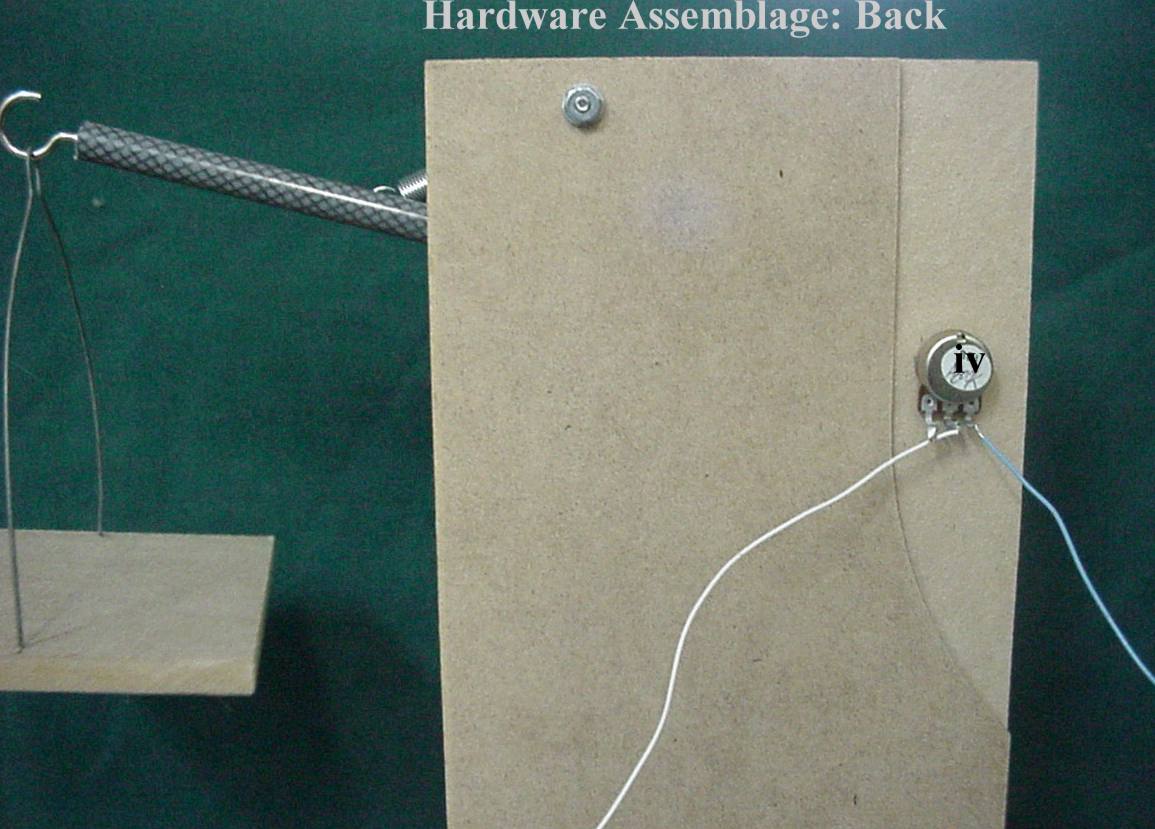
This consists of five main components: a spring (i), a piece of dowel (ii), a basket (iii), and a potentiometer (iv). These two photos should provide an approximate guide for constructing this assemblage.
The potentiometer is 500, 000 Ohms and provides the signal for the computer
gameport.
The spring can be any spring that provides a suitable movement of the
arm.


There are two wires coming from the potentiometer: these are plugged
into the game port, pin 1 (white) and pin 3 (blue).
Note that a potentiometer has 3 connection points, use the center pin
with one of the outside pins so that the resistance is lowest at the uppermost
position.
Software Coding
Now that we have the hardware apparatus completed and plugged into the
computer, we need to write a program (in Q-Basic) to display the weights
on the screen of your computer (this is what a computerized weigh-scale
does). For your convenience, we have divided the coding processes into
four stages.
Stage 1: The Bar
First of all, lets write a program that takes readings from the potentiometer,
and draws a bar on the screen that will vary in length as the potentiometer
turns (a graphical bar that will change in size as different weights are
placed in the tray). Here is a program that will do this (while averaging
the readings to minimize the jitter of the spring):
CLS
Screen 9
Do
a = 0
for x = 1 to 15
a = stick (0) + a
next x
a = a / 15
LINE (200, 0)-(250, a), 0, BF
LINE (200, a)-(250, 349), 2, BF
Loop
Stage 2: The Multiplier
Now, run the program, and push the scale as far down as it will go.
You will probably notice that your bar is only using a small portion of
the screen. We however, want the bar to extent further, so to utilize the
whole length of the screen. To do this, you will have to multiply the variable
"a" by some number. You need to adjust the program so that it will look
something like this (the "?" is where you place your multiplier):
CLS
Screen 9
Do
a = 0
for x = 1 to 15
a = stick (0) + a
next x
a = a / 15
LINE (200, 0)-(250, a * ?), 0, BF
LINE (200, a * ?)-(250, 349), 2, BF
Loop
Try using 2 or 3 (where the "?" is in the above example). Everyone's
multiplier will be different, so you must experiment with this number.
This difference is due to differences in various hardware configurations.
You just want to use whatever number causes the bar to extend the full
length of the screen. Once you have determined the appropriate multiplier,
save the program.
Stage 3: Calibration
First, we need to replace the two "Line commands" (the second and third last lines in your program) with this command:
print a * ?
(again, where we have shown a "?" here, you must place the multiplier which you have determined in Stage 2).
Next, draw up a little graph (on paper) that looks like this:
Weight(grams) Reading
| 0 | |
| 100 | |
| 200 | |
| 300 | |
| 400 | |
| 500 | |
| 600 | |
| 700 |
Now, run the program. Test the scale at each of the weights: for each
weight record (on your graph) the reading that appears on the screen.
Stage 4: Drawing the Graph
First, reload the program you saved in Stage 2 (discard the program
you used to make the graph in Step 3). In this final stage, we have to
get the calibration data (the data from your paper graph) displayed on
the computer screen (so that we can read the weights on the screen). To
do this, we need to draw a line for each of the eight weights (0 grams,
100 grams etc.), and they need to be labeled appropriately. You will need
to insert these three lines of code right after the "Screen 9" command
in your program:
LINE (90, ?)-(600, ?), 1
LOCATE 0, Y
PRINT "0 GRAMS"
Where we have shown the "?", you need to insert the reading (off of
your graph) for 0 grams. Then you need to play with the value of "Y" until
the title "0 grams" appears beside the line. Finally, these three command
lines need to be repeated for 100 grams, 200 grams etc. (right up to 700
grams): each one will have to be 'located' so that the weight sits beside
the appropriate line. For this, you will have to experiment with each.
Having completed these stages, your digital scale should be completed
and useable!