Build a Solar Reflector
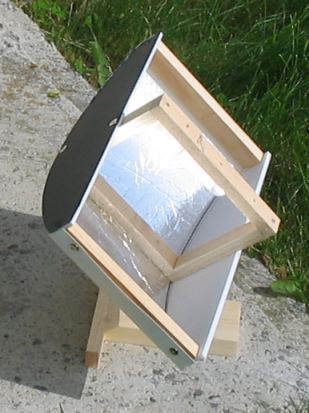
A project from Hila
http://hilaroad.com
The earth is bathed in a steady flow of radiant
energy from the sun. In our part of the world, on a sunny, summer
day, each square meter receives about 700 Joules of energy per second from
the sun. Because the energy is spread out it does not rapidly
heat things the way a microwave or electric oven does..
Concentrating the suns energy can produce dramatic results. Burning a hole in a piece of paper with a magnifying glass demonstrates the power available when the sun's energy is concentrated.
A curved mirror can be used to concentrate radiant energy. This project uses a curved mirror to demonstrate and investigate a method for focusing solar energy.
Theory:
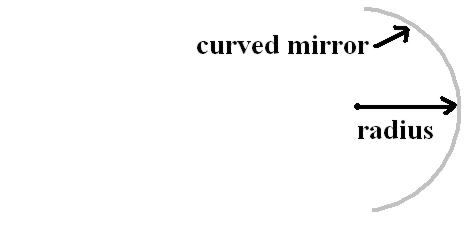
A curved, circular mirror has a constant radius.
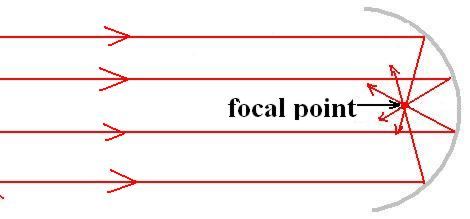
Rays of light from a distant source (parallel rays) reflect through a focal point located at 1/2 the radius of the mirror.
A solar reflector of any size can be built, this one is a compact size designed to safely demonstrate the science behind solar reflectors.
This solar energy project, designed at Hila, uses aluminum foil for the curved, reflective surface, aluminum foil, while not 100% reflective, is reflective enough to demonstrate the effect.
Caution: Large solar collectors with highly reflective surfaces can generate dangerous temperatures.
The radius of our mirror is 22 cm, providing a focal length of 11 cm.
Step 1:
Draw an arc with a radius of 22 cm circle on a piece of light card.
The arc should be at least 36 cm long.
You can use a stick with holes spaced 22 cm as a simple compass to draw this arc. Place a nail in one hole and a pencil in the other.
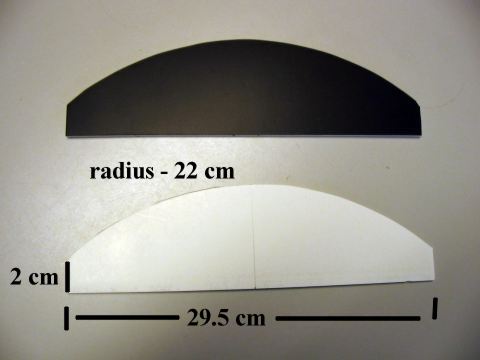
After drawing the curve, cut it to the above dimensions.
Use this shape as a template and trace the shape onto heavy cardboard or foam board.
Create two shapes like this out of heavy cardboard.
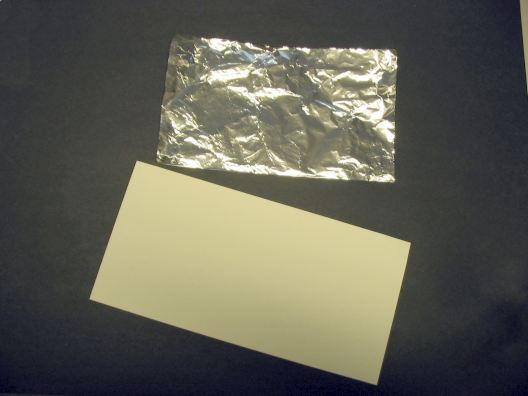
Cut a piece of light cardboard or bristol board 18 cm X 36 cm.
Cut a piece of aluminum foil 30 cm x 18 cm.
Concentrating the suns energy can produce dramatic results. Burning a hole in a piece of paper with a magnifying glass demonstrates the power available when the sun's energy is concentrated.
A curved mirror can be used to concentrate radiant energy. This project uses a curved mirror to demonstrate and investigate a method for focusing solar energy.
Theory:

A curved, circular mirror has a constant radius.

Rays of light from a distant source (parallel rays) reflect through a focal point located at 1/2 the radius of the mirror.
Constructing a Solar Energy Reflector.
A solar reflector of any size can be built, this one is a compact size designed to safely demonstrate the science behind solar reflectors.
This solar energy project, designed at Hila, uses aluminum foil for the curved, reflective surface, aluminum foil, while not 100% reflective, is reflective enough to demonstrate the effect.
Caution: Large solar collectors with highly reflective surfaces can generate dangerous temperatures.
The radius of our mirror is 22 cm, providing a focal length of 11 cm.
Step 1:
Draw an arc with a radius of 22 cm circle on a piece of light card.
The arc should be at least 36 cm long.
You can use a stick with holes spaced 22 cm as a simple compass to draw this arc. Place a nail in one hole and a pencil in the other.

After drawing the curve, cut it to the above dimensions.
Use this shape as a template and trace the shape onto heavy cardboard or foam board.
Create two shapes like this out of heavy cardboard.
Step 2
Cut a piece of light cardboard or bristol board 18 cm X 36 cm.
Cut a piece of aluminum foil 30 cm x 18 cm.

Step 2:
Make a fold (or crease) in 2 cm from each end of card (see image below).
Glue or tape aluminum foil to center of card.
Spray glue works well. Try to press the foil as smooth and flat as possible.
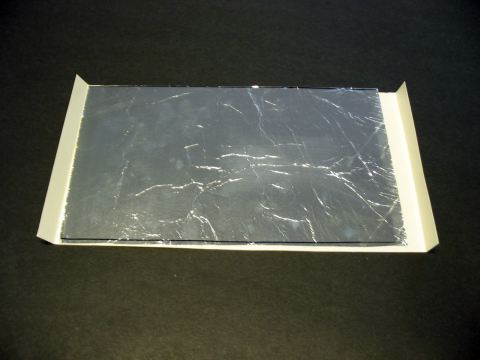
Make a fold (or crease) in 2 cm from each end of card (see image below).
Glue or tape aluminum foil to center of card.
Spray glue works well. Try to press the foil as smooth and flat as possible.

Step 3:
Use 1/2" x 3/4" soft wood pieces to construct a rectangle.
The distance 11.75 cm is important, our reflector has a focal length of 11 cm.
You need two pieces 18 cm long and two pieces 10.5 cm long.

Use 1/2" x 3/4" soft wood pieces to construct a rectangle.
The distance 11.75 cm is important, our reflector has a focal length of 11 cm.
You need two pieces 18 cm long and two pieces 10.5 cm long.

Step 5:
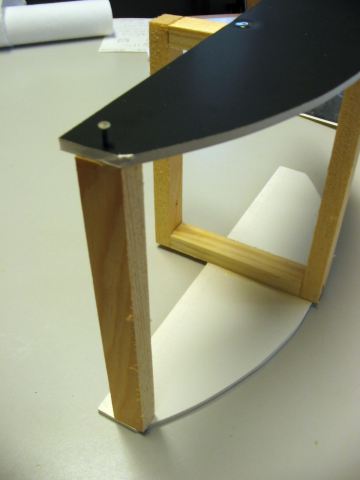
Using glue and tacks or small nails, center and attach the curved templates as shown.
The curved templates mount on the shorter ends of the rectangle.
The curved side is flush with the edge of the rectangle.
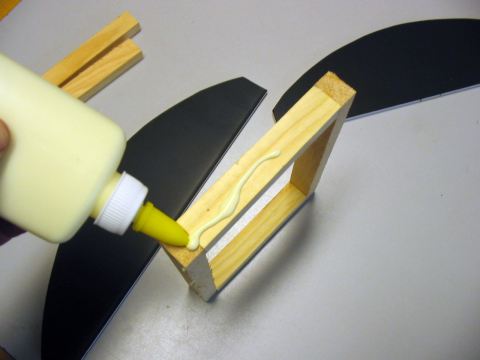
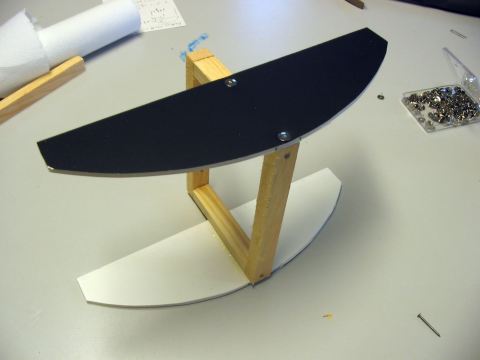
Mount both curves, top and bottom.
Using glue and tacks or small nails, center and attach the curved templates as shown.
The curved templates mount on the shorter ends of the rectangle.
The curved side is flush with the edge of the rectangle.


Mount both curves, top and bottom.
Step 6
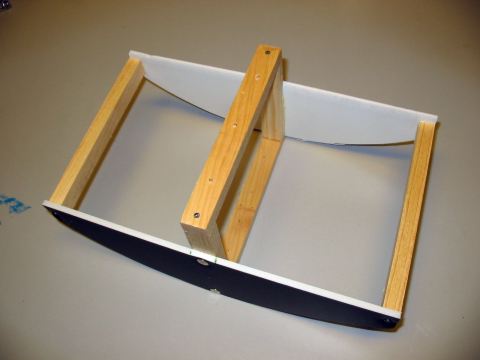
Attach two pieces of 1/2" x 3/4" softwood to the ends as shown. Each piece is 18 cm long.

Solar reflector pointed at the sun.
Note the test tube of water mounted at the focal point.
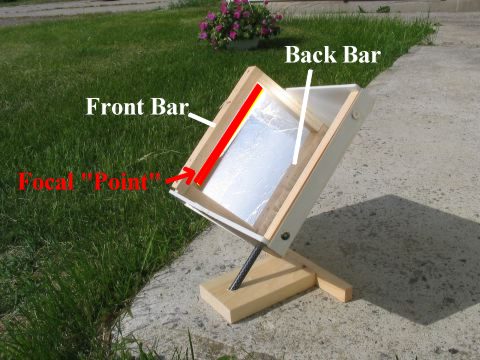
When the shadow from the front bar falls on the back bar, the reflector is aligned with the sun.
The back of the front bar receives focused energy from the sun - this is the focal "point".
The focal point in a mirror like this is actually a line located 1/2 radius from the mirror.
The focal point is the red line in the above image.
You may have to tilt the base to maximize access to the sun.
Reflector viewed from above.
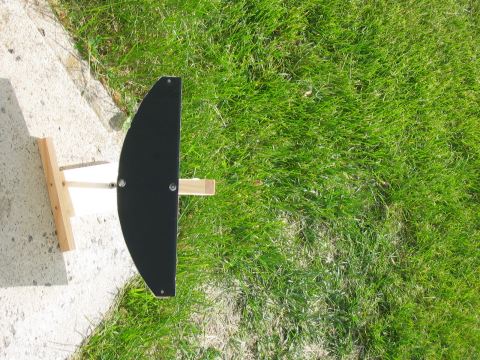
Parallel rays of light striking the curved reflector, bounce back focusing all along
the back of the front bar.
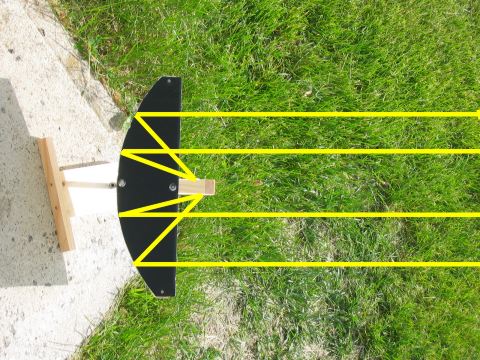
Once aligned with the sun, any object mounted behind the front bar will be heated.
Caution: Don't attempt to create a large reflector without adult supervision.
Never look directly at the sun or the reflection from this reflector.
Keep your face away from the reflector when it is pointed at the sun.
Return
Attach two pieces of 1/2" x 3/4" softwood to the ends as shown. Each piece is 18 cm long.


Step 7:
Attach the reflective surface to the completed frame, use thumb tacks and tape.
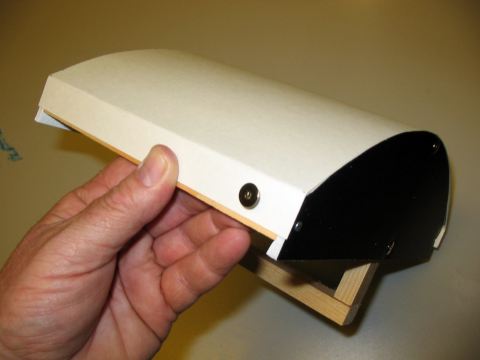
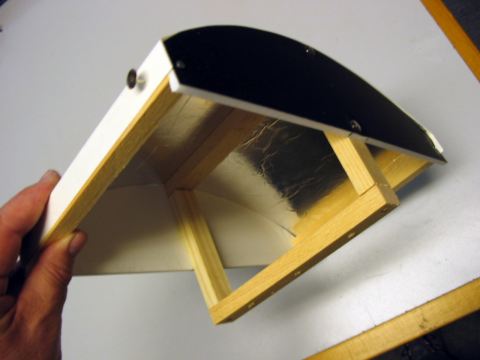
Attach the reflective surface to the completed frame, use thumb tacks and tape.


Step 7:
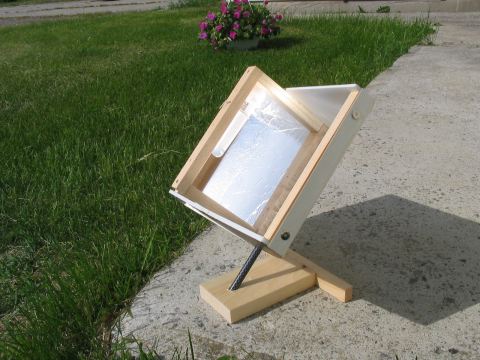
An angled hole in a block of wood holding a dowel makes a simple mount for the reflector.

An angled hole in a block of wood holding a dowel makes a simple mount for the reflector.

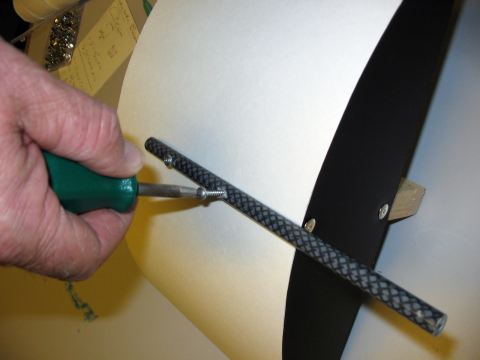
Attach the dowel to the back of the solar reflector.


Solar reflector pointed at the sun.
Note the test tube of water mounted at the focal point.

When the shadow from the front bar falls on the back bar, the reflector is aligned with the sun.
The back of the front bar receives focused energy from the sun - this is the focal "point".
The focal point in a mirror like this is actually a line located 1/2 radius from the mirror.
The focal point is the red line in the above image.
You may have to tilt the base to maximize access to the sun.
Reflector viewed from above.

Parallel rays of light striking the curved reflector, bounce back focusing all along
the back of the front bar.

Once aligned with the sun, any object mounted behind the front bar will be heated.
Caution: Don't attempt to create a large reflector without adult supervision.
Never look directly at the sun or the reflection from this reflector.
Keep your face away from the reflector when it is pointed at the sun.
Return