Following are the instructions for constructing a geodesic dome with a diameter of 50 cm.Geodesic domes are elegant and sophisticated structures. Lightweight and strong, they make very efficient use of materials. They are an ideal structure for use in remote areas like the Arctic. Some day we may even see dome structures on the moon or covering cities.
This site will take you, step by step, through the process of constructing a geodesic dome from paper. Information is also included for designing domes of different sizes.
This project supports the structures and mechanisms component of the science and technology curriculum in many provinces and states. Curriculum expectations often include constructing a geodesic dome or shell structure. Geodesic domes demonstrate tension and compression in a unique structure. You can construct a geodesic dome out of a variety of materials, this dome is constructed of paper. Use the design concepts outlined here to construct domes of different sizes. Try materials like Bristol board, corrugated cardboard, plywood even ice!
For students in grade 6 or grade 7 some teachers have combined this activity with art class, turning the domes into vibrant, colourful sculptures.
The math component of this project is very suitable for applied math in grade 8 or grade 9. Check your state or provincial curriculum documents under "Structures and Mechanisms" and applied math.
Construct a Geodesic Dome:
Geodesic domes, popularized by Buckminister Fuller, incorporate the structural integrity of triangles into the inherent strength of a dome or shell structure.
If you want to build a dome of a different size, follow this link - DOME MATH
Start by producing accurate drawings of the triangles shown below,
you
need 30 of the B-A-B triangles and 10 of the A-A-A triangles.
These
triangular building units are called elements. You must create
these
triangles accurately, the dimensions shown are very important. Use a
compass
and ruler . Note that the dimensions A and B, are the lengths of the
sides
of the triangles, the glue tabs are extra.
Triangle A-A-A is equilateral.
Triangle B-A-B is isosceles.
This is an excellent exercise in geometry! Work with ruler, compass and pencil to create precision technical drawings of each triangular element.
After drawing one of each triangle, photo copy enough to create
the
dome. Most types of paper are suitable.
Use two colours of paper, one colour for the A-A-A triangles, another
for the B-A-B triangles. Colour coding makes construction easier and
makes
your dome more dramatic.
I don't want to draw these triangles. I just want to
build
a dome!
OK, follow the links to a printable page with a template for
the
elements already drawn.
Link to template for A-A-A triangle: (PDF File)
Link to template for B-A-B triangle: (PDF File)
Important Note: After printing one copy of each element, measure the "A" and "B" sides to ensure they are the required lengths, not all printers print with the same resolution.If the elements are the wrong size, try this: when the pdf print dialog box pops up try selecting "Page Scaling - None" or " Fit - Actual Size"
You may be able to correct the size by downloading the templates and then rescale them with a graphics utility.
Cut out the triangles and carefully fold along the tab lines. A
crisp
fold is important.
Join 5 of the A-B-B triangles to create a pentagon. Do this by gluing
the "B" edges together using the glue tabs. Glue sticks are fine for
this
project.
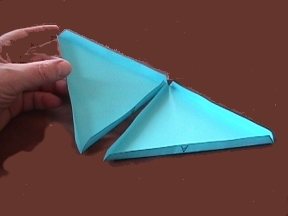
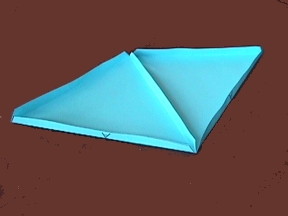
Make sure that the "A" sides of the triangles form the outside of the pentagon.

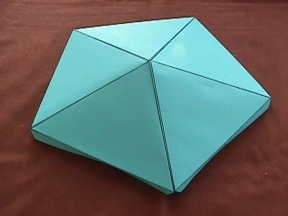
A completed pentagon should look look like the upper right image. Note that it is raised in the center. Create 5 more pentagons.
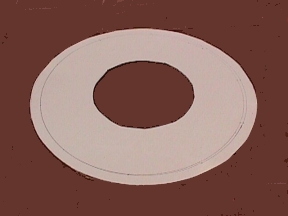
Create a circular base for your dome by cutting a 75 cm diameter
circle
from cardboard.
Draw a 50 cm diameter circle in the center of the base.
Cut a 25 cm circle out of the center of the base. This allows access to the interior of the dome.
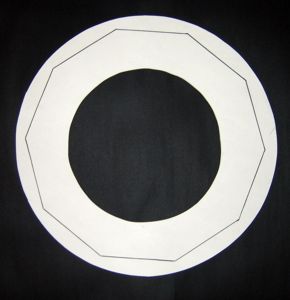
Important: Carefully draw a series of chords around the circle. Each chord is "A" in length.
For our 50 cm dome A = 15.45 cm. Align these chords so that 10 of them fit perfectly around the circle.
These lines indicate where to place the base of each triangle.
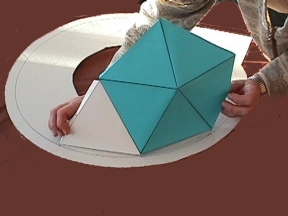
Join two pentagons by gluing one of the "A-A-A" triangles between
them.
Add another triangle as shown.
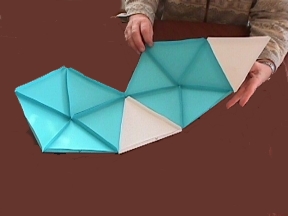
Glue this completed section to the base. The edge of each triangular element aligns with one of the chords.

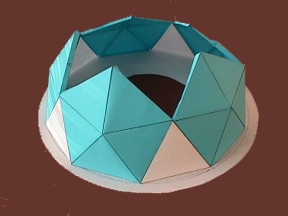
Continue adding pentagons and triangles, joining them with glue.
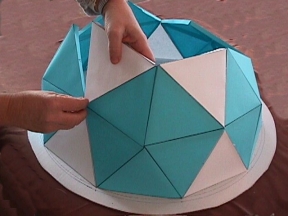
Glue equilateral ( A - A - A ) triangles between pentagons on top.
Glue final pentagon on top.
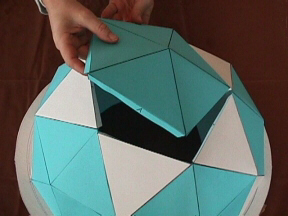
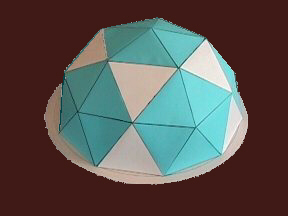
Your dome is completed. To learn more about domes, follow this link to Dome Math.
Page created at: Hila Science Camp: http://hilaroad.com